
How to add scrolling animation to Squarespace
Vertical and Horizontal Movement, Opacity, Scale, Rotate, and Blur
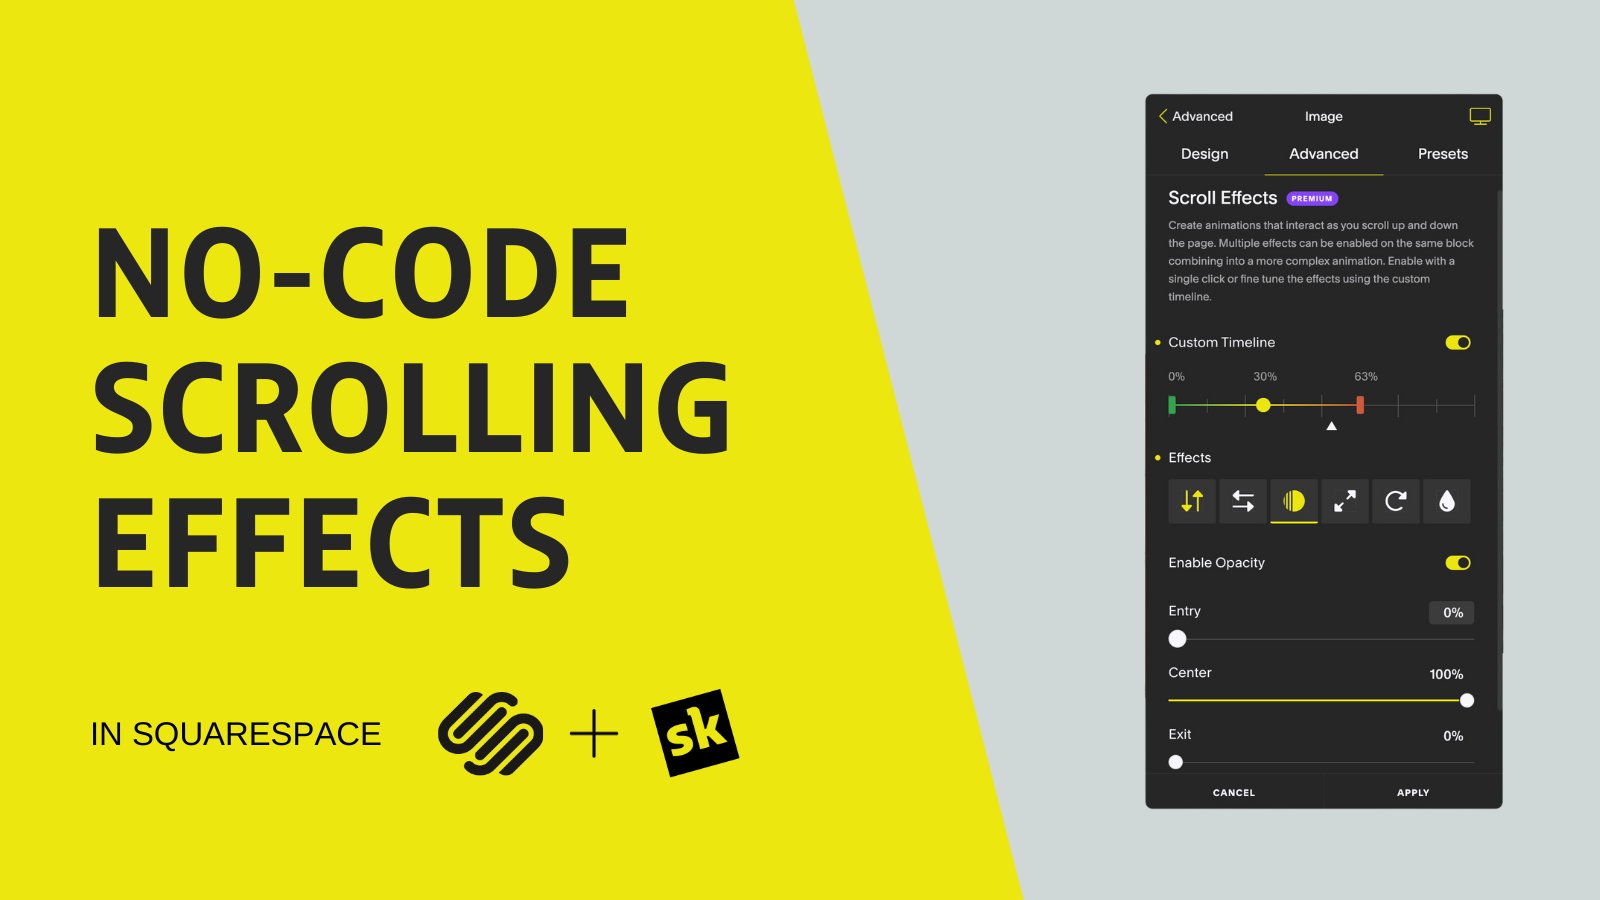
Select any block on Squarespace and click on the Advanced Tab. Enable scrolling effects with a single click, or combine multiple effects and the custom timeline to curate more complex animations. Scrolling is an Advanced Feature and is available on Pro, Designer and Agency plans. We can't wait to see what you all will do with this tool.
How to Add Simple Scrolling Effects to Squarespace
-
SquareKicker Scrolling Effects is an advanced square kicker feature found in the square kicker block settings. Click on the block then into SquareKicker Tools and head to advance. You'll be presented with a scrolling effects timeline. This is a timeline in which your block will travel through for the animation to occur.
The triangle represents your block, and the circle represents when the block is in the center of the screen. This center point is in the center of the block you're on when the block is at the start of the timeline. This means the block is below the bottom of the screen. As the block travels into view, I can see my block moving on the timeline when it reaches the end, the original position of the block has completed scrolling through the vertical path of the screen..
To apply a scrolling effect to this block, I have two options within this UI, the entry effect and the exit effect. The entry effect will be how my block is animated from the start of the screen till it gets to the center . My exit effect is how it will exit from the center to the end.
So if I want add an entry effect where it fades in slowly click on opacity and enable it. Now I have the option for my block to start at a specific opacity as it enters into the screen. If I move my slider down to zero, that means at the start of my timeline, my block will be at zero opacity, but when it comes into the center, it will be at 100%.
As you can see, when I scroll vertically up and down the screen, my block will slowly fade into. I can change the starting position to say 30%. That means it will start at 30% opacity and make its way into a hundred percent when it finishes scrolling to the center of the screen. I can do other animations as well.
If I want it to rotate, I can click on rotate and I can choose to have a start, 180 degrees at the start of the timeline, and when it gets to the center, it'll be in its original. For this design, I want my text block to not only fade in, but also scroll down the screen and scale into view. This way I can combine multiple scrolling effects on the same timeline for my entry effect.
So first, I'm gonna have my vertical emotion enabled. As you can see, I want my block to start at minus 70%. It started to minus 70% above where the block should. As I scroll down, once the block reaches the center of the screen, it will be in its original position at 0%. The next thing I want to do with my block is scale it down into view, so I head over to scale and switch on Enable.
Now my block is 150% of its original size, and as it reaches the center , it gets to 100% or its original size. I can also choose how my block leaves the screen by selecting an exit effect. Head down to exit effect and switch Enable on the animation you want to choose, and as the block gets from the center of the screen to the top, in this case, it moves 10% in a vertical motion.
So now my button has a slight parallax scrolling effect as I scroll down the screen.
There may be a time when scrolling effects moves a block in front or behind another block, and you want to override the Squarespace layer level to customize the layer of a block, head to the layer tool in the advanced settings of a block and select, send it back, bring to front, or you can select a custom layer level to organize multiple blocks in a specific order if required.
Now that you understand the basics of square kicker screwing effects for more complex designs, watch the next video on the custom timeline for scrolling effects.
Using Advanced scrolling animation for Squarespace
-
Scrolling Effects is a square kicker tool that allows you to create animations on Squarespace websites triggered by the user's scroll position on the page. This adds an extra layer of interactions and engagement to your website. If you haven't already watched the first tutorial on how to create scrolling animations on Squarespace, head back and watch that before you continue as I'll skip over most of the basics for how to use scrolling effects.
In this video, I'll go over how to use scrolling effects custom timeline. This custom timeline allows you to specify different animation properties for different points on your screen. This allows you to create multi-stage animations that change over the course of a user scroll position. Say you want to use a shape block as a background and fade this in quickly to change the background color of a section.
Maybe you want a series of blocks that scroll horizontally at different timings. With the scrolling effects custom timeline. You can do all of this and more.
So let's open up scrolling effects on a block. As you'll remember from our first video, you can see my block scrolling on this simple timeline while it's traveling vertically on the screen. When I enable an effect on this timeline, I can select the intensity of this effect as a block enters and leaves the screen.
But when the block reaches the center of the screen, the block will arrive at it's original position or the design before any effect was added. When you toggle the custom timeline on, you're immediately presented with new timeline options. Just as before, you can see your block moving on this timeline, but now you have the ability to select a new center point for your animation.
So instead of your block only reaching the center of the screen, which is 50%, it now goes to 40%, which is your new center for your design, and you can pause the center point for as long as you want.
In this example, the center animation for my block is now between 40 and 60% of my screen. You can also choose on your timeline where your block's, animation starts and ends.
When you enable an effect, this is where a lot of the custom control comes in. Before, when you only chose how an animation effect started or ended, with the custom timeline enabled, you can select the amount of animation for when your block reaches the center of your timeline as well. You can see that when your block starts at 0%, or the bottom of your screen, this vertical effect will scroll from the position of 25%.
Which in this case is 25% from its original position, all the way to the center, which is 0 percent. If we look back at our custom timeline, we can see the entry effect here, which is between zero and 40% of the screen. But now this block will hold the value for the center effect. Once it reaches 60%, we can then select an exit animation, which is minus 25% or 25% above the original position of this block while this block exits the screen.
You can change the length for the center of the timeline. By dragging the timeline anchor points. You can merge these points as well by dragging them together to create a single center point for your effect. By setting your center and exit value as the same. You can create one continuous animation that plays throughout the length of your timeline.
To separate your center points again, hover over the center anchor and click on the dot below to open up the center of your timeline.
For this design, I'm going to set a vertical motion effect with an entry of 25% and an exit of minus 25%. and leave my center value at zero. I'll also enable the opacity effect and bring the opacity down to 0%. This is so that my image fades in, but then as it leaves the screen, I want to keep the opacity at 100% for my exit effect, so it doesn't fade away.
And now I want my next block to have this same animation as well. But instead of recreating this again on the block below, I'm going to turn this into a preset. I'm gonna call this preset Parallax Scrolling Slow. I want to make my next three images similar, but it move slightly faster.
So I'll duplicate this, and create a new preset and call it something slightly different.
Once I've modified my preset, I can now quickly head to my other blocks and apply this preset to them as well.
So now, as you can see here, I have a group of blocks that are scrolling with smooth animation at different speeds, while also fading into view. Now it's your turn. With the power of scrolling effects at your fingertips, you can bring your designs to life. And create next level interactive websites that would otherwise only be possible with hours of complex code.
The only limit is your imagination. So let SquareKicker open up your ideas and explore a whole new way of design.